For any brewery owner, choosing the right fermentation tank and beer bright tank (also known as a Bright Beer Tank or BBT) is one of the most important decisions you will make. A wrong choice can lead to inconsistent beer quality, high costs, and slow production. The right choice brings stable fermentation, faster turnover, better flavor, and room for growth.
Based on experience helping breweries worldwide, this guide covers how to choose the right size, material, and design, as well as how to maintain your stainless steel tank equipment for 20+ years.
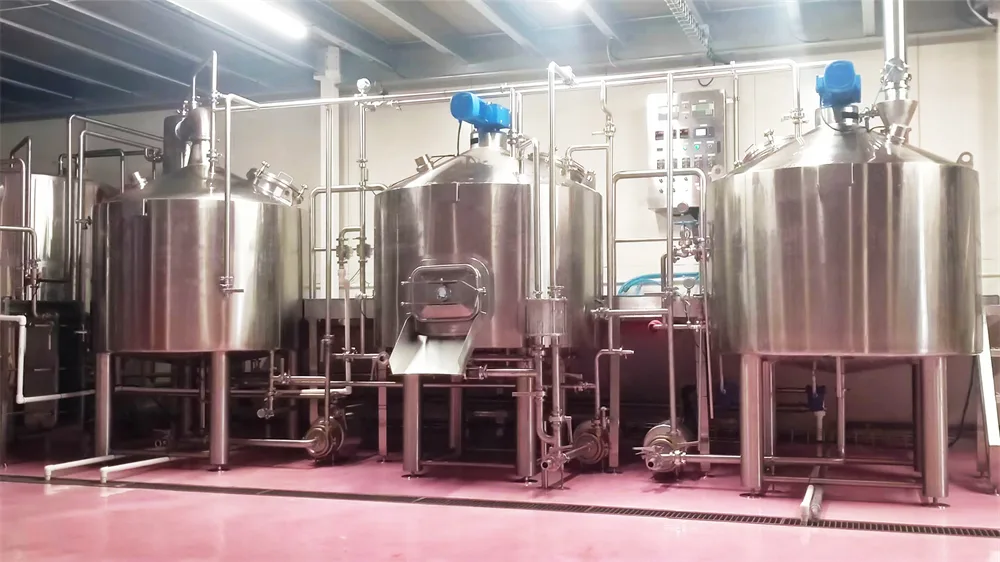
1. What Are They?
- Fermentation Tank: This is where the magic happens. Yeast eats sugar in the wort (unfermented beer) and turns it into alcohol, CO2, and flavor.
- Beer Bright Tank (BBT): This is where the beer gets finished. Here, the beer is clarified, carbonated, stabilized, and stored before being packaged or served.
How They Work Together:
Think of your brewery as an assembly line:
Brewing System → Fermentation Tank → Beer Bright Tank → Packaging
If one part of this line is too small, the whole factory slows down. A balanced system means faster turnover, consistent quality, and higher yearly production.
“Your fermentation room is the engine; your bright tanks are the transmission. If they don’t match, your brewery can never run at full speed.”
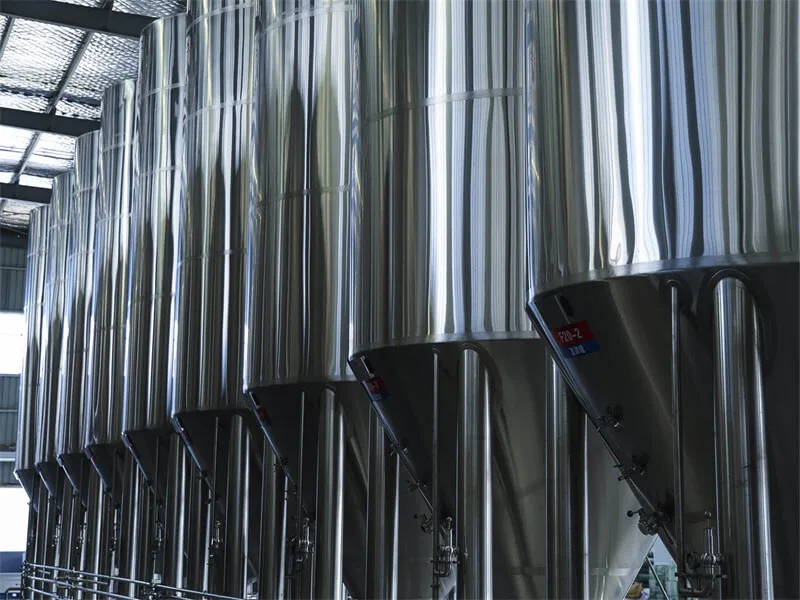
2. How Big Should Your Tanks Be?
Choosing the Right Fermentation Tank Size
A common mistake is buying tanks that are too small.
- The Rule: Your total fermentation capacity should allow you to keep brewing while previous batches are fermenting.
- Typical Ratio: For most ale breweries, 3 to 4 fermentation tanks for every 1 brewing system is a good start. This allows you to brew a new batch every day while others are fermenting (which takes 7–14 days).
- For Lagers: Since lagers take longer (21–45 days), you may need 6 to 8 tanks per brewing system.
Choosing the Right Beer Bright Tank Size
Your bright tanks need to hold enough beer to keep your packaging line or taps running smoothly.
- Size: Each bright tank should hold 1 to 1.5 times the size of your brewing batch.
- Quantity: You usually need at least 2 bright tanks. While one is being filled or carbonated, the other can be emptied, cleaned, and ready for the next batch.
- Ideal Setup: A common efficient setup is 3–4 fermentation tanks paired with 2 beer bright tanks.
3. Key Materials and Build Quality
Never compromise on the quality of your stainless steel tank.
- Material: Use SUS304 stainless steel for standard use. If your water has high chlorine or you use strong acids, upgrade to 316L for better corrosion resistance.
- Welds: All internal welds must be smooth and polished. Rough welds hide bacteria and make cleaning impossible. Look for “automatic orbital welding.”
- Surface Finish: The inside surface should be very smooth (polished to Ra ≤ 0.4μm) to prevent bacteria from sticking.
- Cooling Jackets: Ensure the tank has cooling zones on both the cone (bottom) and the sides to control temperature evenly.
- Insulation: Thick insulation (at least 80mm) saves energy and keeps temperatures stable.
- Pressure Rating:
- Fermentation Tanks: Usually 0.2–0.3 MPa (higher if doing pressure fermentation).
- Beer Bright Tanks: Should handle 0.3–0.5 MPa for carbonation and storage.
4. Top 5 Mistakes to Avoid
- Not Enough Fermentation Space: This is the #1 bottleneck. If you run out of tanks, your brewing system sits idle.
- Ignoring Future Growth: Don’t fill your room 100%. Leave space for 1–2 extra tanks later.
- Poor Welds and Rough Surfaces: Bad welding leads to infections and ruined beer.
- Weak Cooling: If the cooling jackets are too small, you cannot control the temperature, especially in the bottom cone where yeast settles.
- Focusing Only on Price: Cheap tanks often cost more in the long run due to higher energy bills, wasted cleaning chemicals, and lost beer.
5. Maintenance Guide: How to Make Your Stainless Steel Tanks Last 20 Years
Buying good tanks is just step one. Proper daily care ensures they last for decades.
A. Cleaning (CIP – Clean In Place)
Rule: Clean the tank immediately after emptying it. Never leave beer residue overnight.
Basic Steps:
- Pre-Rinse: Use warm water (~40°C) to rinse out leftover beer and yeast.
- Caustic Wash: Circulate a hot (70–80°C) solution of food-grade soda ash or caustic soda for 30–45 minutes. This removes protein and organic matter.
- Rinse: Rinse with clean water until the pH is neutral.
- Acid Wash (Weekly): Once a week, use a mild acid solution to remove mineral buildup (beer stone) and shine the steel.
- Final Rinse: Rinse with sterile or clean water.
Tip: Check your spray balls regularly to make sure they are not clogged.
B. Passivation (Restoring the Protective Layer)
- What is it? A process that strengthens the natural protective layer on the stainless steel to prevent rust.
- When? Do this when the tank is brand new, or once a year as deep maintenance. You do not need to do this every day.
- How: Use a specialized passivation acid (like citric or nitric acid) following the supplier’s instructions.
C. Gaskets and Seals
Rubber gaskets are the weakest point and can harbor bacteria.
- Check: Inspect gaskets on manways and valves every time you open them. Look for cracks or hardening.
- Replace: Change all gaskets at least once a year, or sooner if they look worn. Keep spare parts in stock.
D. External Care
- Clean Outside: Wipe the outside of the stainless steel tank with a soft cloth and mild cleaner. Never use steel wool, as it scratches the surface and causes rust.
- Inspect: Regularly check for leaks around valves and cooling pipes. Make sure pressure gauges read zero when the tank is empty.
E. Long-Term Storage
If you stop using a tank for more than a week:
- Clean and sanitize it thoroughly.
- Dry it completely.
- Close all valves tightly.
- Fill with a little CO2 to keep positive pressure (this keeps bad air out).
Note: Storing tanks filled with chemical liquids is risky and generally not recommended unless strictly monitored.
6. Frequently Asked Questions (FAQ)
Q1: How many fermentation tanks does a small brewery need?
Most small breweries run efficiently with 3–4 fermentation tanks for one brewing system. This allows continuous brewing without waiting for fermentation to finish.
Q2: Can I use a bright tank as a fermenter?
No. They have different jobs. Fermenters handle active yeast and heat; bright tanks are for quiet storage and carbonation. Mixing them up creates scheduling chaos and infection risks.
Q3: Should fermentation tanks and bright tanks be the same size?
Not necessarily. Fermentation tanks are often larger or more numerous to handle the long fermentation time. A common ratio is 3 or 4 fermenters for every 2 bright tanks.
Q4: How long does beer stay in a bright tank?
Usually 3 to 7 days. This is enough time for carbonation and clarification. Keeping beer there too long wastes tank space.
Q5: What is the difference between 304 and 316L stainless steel?
304 is standard and works for most breweries. 316L is stronger against rust and corrosion. Choose 316L if your water has high chlorine or if you use harsh cleaning chemicals often.
Final Thought
Your fermentation tank and beer bright tank are the heart of your brewery. Smart selection starts your journey, but disciplined maintenance keeps you brewing great beer for years to come. Invest in quality stainless steel tank systems and take care of them, and they will pay you back with consistent, delicious beer. If you have further questions about specific configurations or maintenance details, feel free to reach out anytime.