So you’re thinking about setting up a commercial brewery, or maybe you’re just curious about how all that shiny stainless steel fits together. Either way, you’ve come to the right place. Let’s walk through what a complete brewing system actually looks like—no sales fluff, just straight talk.
First, the Big Picture: What Makes Up a Complete System
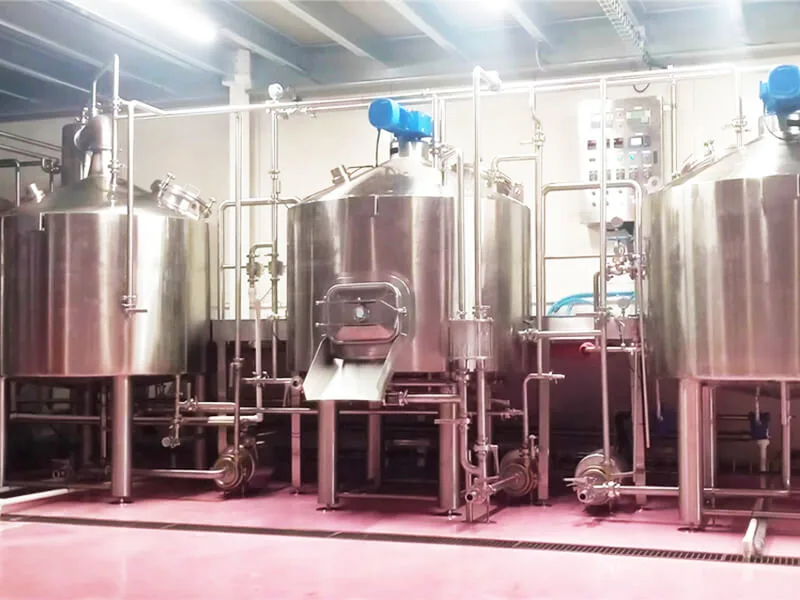
A commercial brewing system isn’t just one big machine. It’s a chain of connected pieces, each doing a specific job. Here are the main blocks:
- 밀링 – crushing the grain
- 양조장 – mashing, lautering, boiling, whirlpooling
- 발효 – where yeast does the real magic
- Filtration and packaging – getting the beer clear and into kegs, cans, or bottles
- CIP (Clean-in-Place) – keeping everything sanitary
- Refrigeration and steam – controlling temperature
- Controls and automation – the brains of the operation
These all connect through a network of pipes, pumps, and valves. Get the connections wrong, and you’ll be cleaning up messes (and off-flavors) forever.
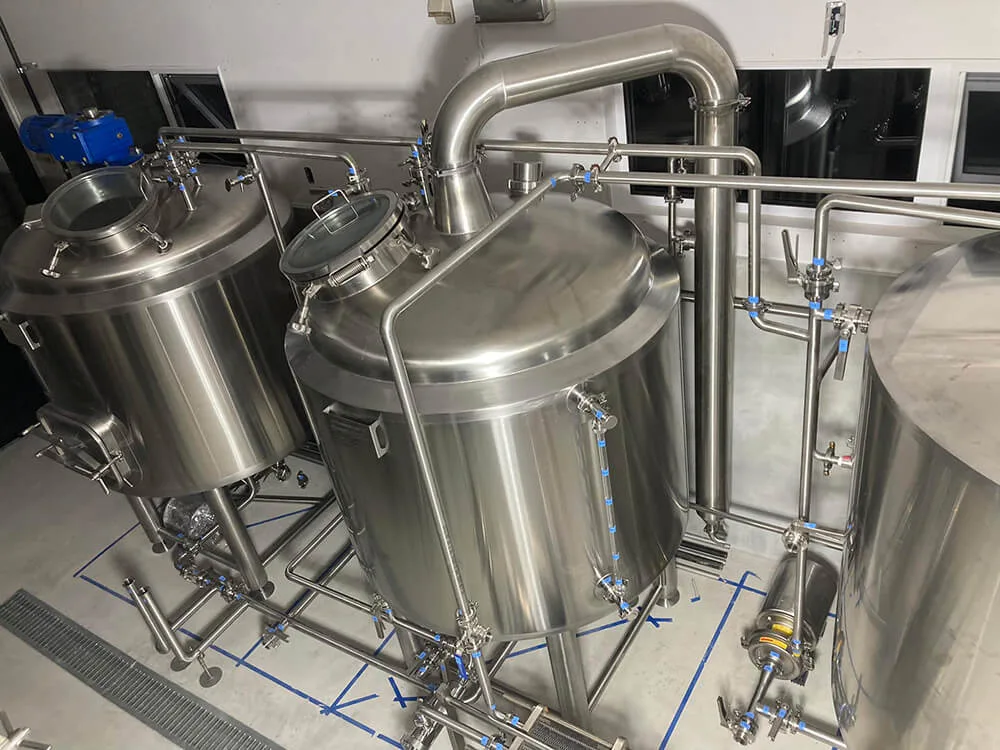
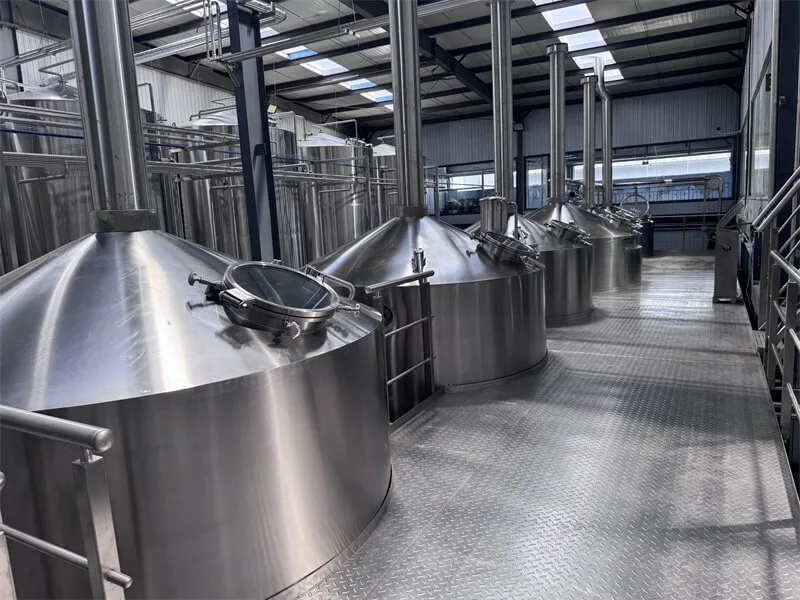
The Brewhouse: Choosing Your Vessels
This is where hot side magic happens. You’ll hear terms like “two-vessel,” “three-vessel,” and “four-vessel” systems. Let’s break it down simply.
Two-vessel systems combine functions. Typically, one vessel handles mashing and lautering, while another handles boiling and whirlpooling. Great for smaller spaces and simpler operations, but you can only do one batch at a time.
Three-vessel systems give you a dedicated mash tun, lauter tun, and a combined boil kettle/whirlpool. This lets you start mashing the next batch while the current one is still boiling. More throughput, more flexibility.
Four-vessel systems separate everything: mash tun, lauter tun, boil kettle, and whirlpool. This is for serious production volume. You can run overlapping batches all day long.
The takeaway? More vessels aren’t “better”—they’re just faster if you need the output. A small brewpub doesn’t need four vessels. A regional brewery might.
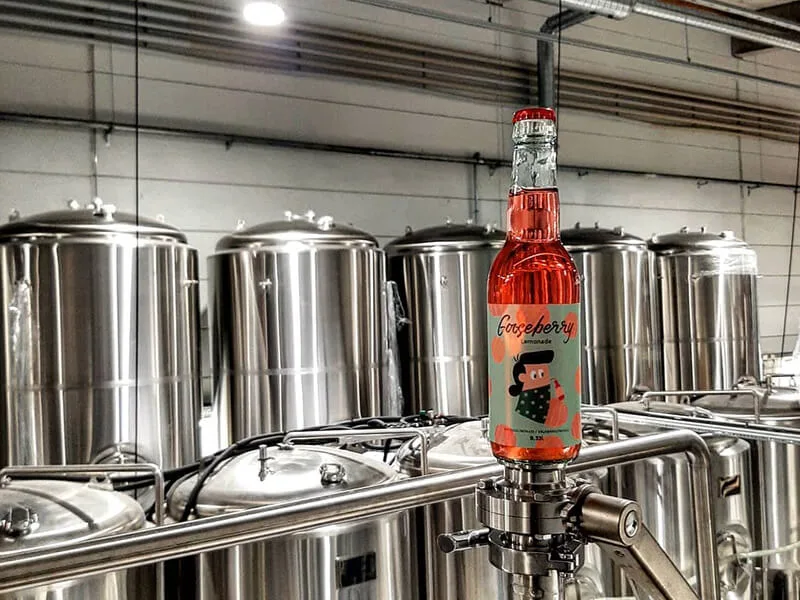
Fermentation Tanks: Where the Magic (and Stress) Happens
Your fermenter design affects everything: yeast health, beer clarity, cleaning efficiency, and even what styles you can brew.
Tank Shape Matters
Tall and skinny, or short and squat? Taller tanks put more hydrostatic pressure on yeast, which can suppress ester production and change fermentation character. Shorter, wider tanks are gentler on yeast. Neither is wrong, but know what you’re getting.
Cooling Jackets: The Unsung Hero
Jackets aren’t just one big blanket wrapped around the tank. They come in segments—usually two or three. The bottom jacket controls fermentation temperature. The upper jacket(s) help with crashing and conditioning. If they’re poorly placed, you’ll get temperature stratification, sluggish fermentation, and yeast that refuses to drop out properly.
The Cone Angle
The cone at the bottom needs the right angle. Too shallow (like 60 degrees), and yeast and trub won’t slide out cleanly. Too steep (like 90 degrees), and you’re wasting tank volume. Around 70-75 degrees is the sweet spot for most breweries.
Tank Top Real Estate
Up top, you’ll find the CIP spray head, pressure/vacuum relief valve, dry-hop port, and maybe a manway. These all compete for space. Cram them too close together, and you create shadow zones where spray balls can’t reach. That means hidden gunk. That means contamination.
Pressure Rating: Pay Now or Pay Later
A standard non-pressure fermenter is cheaper. A pressure-rated tank (2-3 bar) costs significantly more, but it lets you do natural carbonation, pressure fermentation, and closed transfers. If you want to brew lagers cleanly or make IPAs with minimal oxygen pickup, this is not where you cheap out.
.webp)
Pipes and Valves: Where Corners Get Cut (and Beers Get Ruined)
Pipes are the circulatory system. Get them wrong, and you’ll fight infections forever.
Pipe Diameter
Too small, and you’ll have turbulent flow that knocks CO2 out of solution. Too big, and your CIP chemicals move too slowly to scour properly. There’s an optimal velocity range. A good system designer knows these numbers.
Valve Types: A Quick Cheat Sheet
- Butterfly valves – cheap, simple, but they trap gunk behind the disc. You can’t fully clean them without disassembly.
- Ball valves – fully cleanable in place, but expensive. Cavity-filled designs can trap liquid, so spec full-bore, encapsulated balls.
- Diaphragm valves – excellent hygiene, often used on tank bottoms.
Smart breweries mix and match. Butterfly valves are fine on the hot side where temperatures kill everything. Cold side? Invest in better valves.
Slope Your Pipes
Every horizontal pipe needs a slope—even just 1-2%. Otherwise, liquid pools in low spots and grows microbes. You’ll smell it before you see it. By then, it’s already in your beer.
Tri-Clamp vs. Welded
Tri-clamp connections make everything easy to take apart for cleaning. They also give you dozens of potential leak points and gasket crevices. Fully welded lines are hygienic but a nightmare to modify. Most breweries end up somewhere in the middle: welded where possible, clamps only where necessary.
Dead Legs Are the Enemy
A dead leg is any section of pipe where product sits stagnant. Picture a T-junction with a capped-off branch. Beer or cleaning solution gets in but doesn’t flow through. Bacteria party there. The rule of thumb is that any dead leg should be less than 1.5 times the pipe diameter in length. Shorter is better. Zero is ideal.
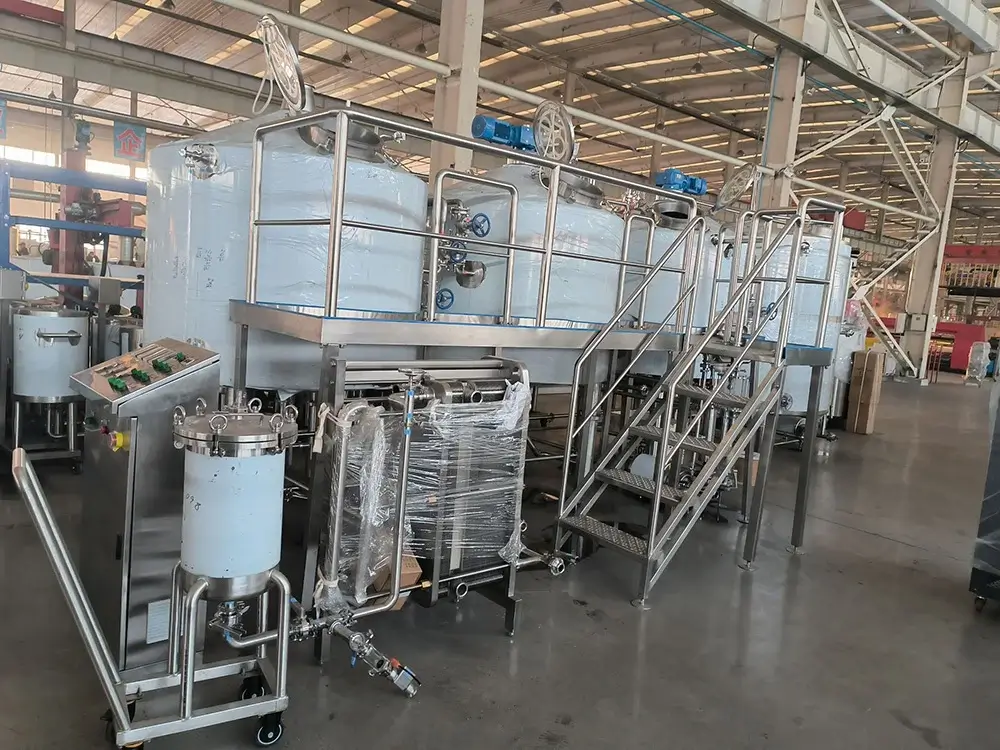
CIP Systems: The Thing That Keeps You in Business
You can brew great beer. But can you brew it twice in a row without contamination? That’s CIP.
Central vs. Local
A big central CIP station serves all your tanks. It’s efficient but requires long pipe runs that need cleaning themselves. Local CIP carts sit by each tank. Simpler piping, but you’re buying multiple sets of pumps and heaters. For smaller breweries, one good central system usually wins. For large ones, dedicated systems per tank group make sense.
Spray Ball Positioning
The CIP spray head must reach every surface. Miss a spot, and you’ve got a biofilm factory. The most common blind spot? The top inner shoulder of the tank just below the spray head itself. If you’re not validating coverage with riboflavin testing, you’re guessing.
Chemical Tanks
A basic setup needs at minimum: a hot water tank, a caustic (alkaline) tank, and a recovery tank. Many add an acid tank for passivation and periodic acid washes. The smartest setup recovers and reuses chemicals multiple times. Caustic can be reused for weeks if you monitor its concentration.
Pump Sizing
The spray head needs enough flow and pressure to hit hard. Too little flow, and the cleaning solution just dribbles down the wall instead of blasting it. This isn’t just about pump horsepower—it’s about matching the pump curve to the spray head specifications.
CIP Return Lines: Don’t Forget These
The pipes carrying dirty CIP solution back to the skid also need cleaning. If your return lines are filthy, you’re pumping clean chemicals through dirty pipes right before they hit your “clean” tank. That defeats the whole purpose.
Refrigeration and Steam: The Hidden Money Burners
These systems run 24/7 and show up on your electricity and gas bills every month.
Glycol and Ice Water
You need a cold reservoir—typically a big insulated tank of glycol-water mixture. Size it right. Too small, and on a hot summer day when three fermenters are actively crashing, your glycol temp rises and fermentation control goes out the window. Bigger isn’t always better (more cost, more space), but undersized will haunt you.
Ammonia vs. Freon
Ammonia refrigeration is more efficient and cheaper to run long-term, but it’s toxic. Regulations are strict, and your insurance will care. Freon-based systems are simpler and safer on paper, but environmental regulations are phasing out many refrigerants. Whatever you choose, know that replacement refrigerants are getting more expensive and harder to source.
Steam Boiler Sizing
Your boiler’s biggest demand comes during knockout—when you’re running the kettle full-bore. But that’s only a couple hours per brew day. The rest of the time, you’re just keeping the HLT warm. A boiler sized for peak demand will be oversized for everything else. Some breweries use smaller boilers with buffer tanks. Others run larger boilers that cycle on and off. Each approach has efficiency tradeoffs.
Condensate Recovery
Steam condenses back into water after giving up its heat. That water is hot, pure, and already paid for. Dumping it down the drain is literally throwing money away. A condensate return system sends it back to the boiler, saving water, chemicals, and fuel. Payback is often under a year.
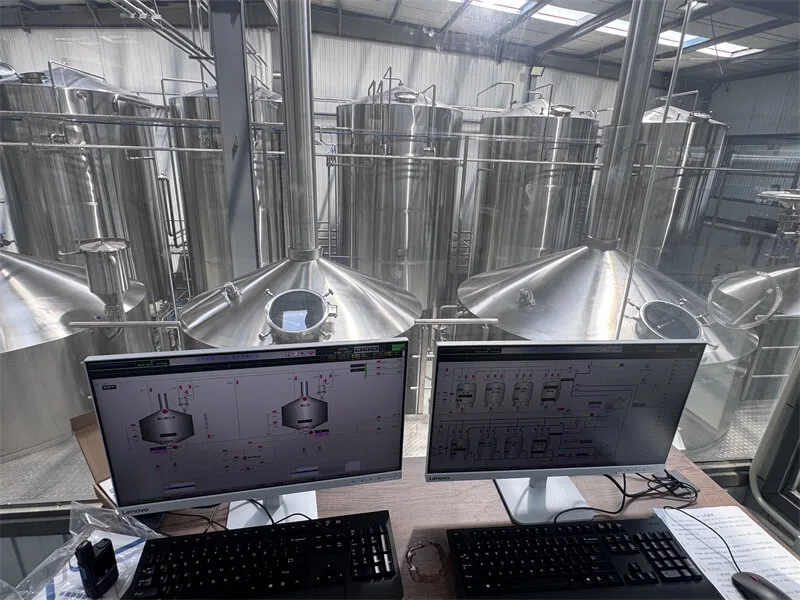
Controls and Automation: What You Really Need
It’s easy to get hypnotized by touchscreens and fancy dashboards. Let’s be practical.
Manual, Semi-Auto, or Full Auto?
Manual works for nanos. You flip valves and watch thermometers. Cheap, flexible, but labor-intensive.
Semi-automated handles the repetitive stuff—temperature control, pump on/off for CIP cycles, basic step mashing. A good PLC with reliable temperature probes does the heavy lifting. This is the sweet spot for most craft breweries.
Fully automated systems can run a brew day from grain-in to knockout with minimal human input. Great for consistency across shifts, but when something goes wrong, you need someone who can troubleshoot both brewing and PLC code.
Sensors > Algorithms
A fancy algorithm can’t fix bad data. Install multiple temperature probes at different heights in every tank. A single probe can’t tell you if there’s stratification. Redundant probes are cheap insurance.
The Best Automation Investments
Here’s what actually moves the needle:
- Automated fermentation temperature control – this pays for itself in consistency.
- Pre-programmed CIP cycles – ensures every wash hits the right time, temp, and chemical concentration.
- Alarm notifications – if a fermenter goes above 22°C at 3 AM, your phone should scream at you.
Everything else—recipe managers, touchscreen mash schedules, cloud dashboards—is nice to have. But these three? These save batches.
And one final piece of advice: before you buy any automation, ask “Who fixes this when it breaks?” If the answer involves a plane ticket and a consultant from Germany, factor that into your budget.
Wrapping Up
A commercial brewery is a complex puzzle. Every piece connects to every other piece. The brewhouse determines your throughput. The fermenter design shapes your beer. The piping keeps it safe. The CIP keeps it clean. The refrigeration keeps it cold. The controls keep it consistent.
There’s no one “best” setup. The best system is the one that matches your production goals, your budget, and your tolerance for fixing things at 2 AM.
Choose carefully. Clean relentlessly. And may your yeast always finish on time.
加入谷歌SEO优化
Commercial Brewing Equipment: A No-Nonsense Guide to What You Actually Need
Setting up a commercial brewery? Or just researching how professional brewing systems actually work? Either way, this guide covers every major component—from the brewhouse to the controls—with practical advice on what matters and what doesn’t. No sales pitch. Just straight talk from someone who’s seen what works and what breaks.
What Makes Up a Complete Commercial Brewing System?
A commercial brewery isn’t one machine. It’s a connected chain of subsystems:
- Grain handling and milling – crushing malt before mashing
- Brewhouse (hot side) – mashing, lautering, boiling, whirlpooling
- Fermentation (cold side) – where yeast turns wort into beer
- Filtration and packaging – getting beer clear and into kegs, cans, or bottles
- CIP(클린 인 플레이스) 시스템 – cleaning and sanitizing everything without disassembly
- Refrigeration and steam – temperature control and heating utilities
- 제어 시스템 – automation, monitoring, and alarms
Each subsystem connects through a network of pipes, pumps, and valves. Design one poorly, and you’ll fight contamination, off-flavors, or sky-high utility bills forever.
Let’s break down each part in detail.
Brewhouse Equipment: Choosing the Right Vessel Configuration
Your brewhouse determines your production capacity and beer styles. You’ll hear terms like two-vessel, three-vessel, and four-vessel brewhouses. Here’s what they actually mean.
Two-Vessel Brewhouse Systems
A two-vessel system combines functions. Typically:
- Vessel 1: Mash/lauter tun combo – grain mashing and wort separation happen in one tank
- Vessel 2: Kettle/whirlpool combo – boiling and trub separation share a vessel
최상의 대상: Small breweries, brewpubs, and startups with limited space and budget. Simple to operate but limited to one batch at a time.
Three-Vessel Brewhouse Equipment
Three-vessel systems add separation:
- Vessel 1: Dedicated mash tun
- Vessel 2: Dedicated lauter tun
- Vessel 3: Combined kettle/whirlpool
Key advantage: You can start mashing the next batch while the current batch is still boiling. This overlapping capability increases daily throughput significantly.
Four-Vessel Commercial Brewhouse
Full separation of all functions:
- Vessel 1: Mash tun
- Vessel 2: Lauter tun
- Vessel 3: Boil kettle
- Vessel 4: 월풀
최상의 대상: Regional breweries and high-volume production. With four vessels, you can run overlapping batches continuously throughout the day.
The key takeaway: More vessels aren’t automatically “better.” They increase throughput, not beer quality. A 10-barrel brewpub doesn’t need four vessels. A 30-barrel production brewery might. Match the configuration to your production targets, not your ego.
Fermentation Tank Design: Why Every Detail Matters
Your fermenter determines beer character, yeast performance, and cleaning effectiveness. Here’s what to get right.
Tank Geometry: Tall and Slim vs. Short and Wide
Fermenter proportions directly affect beer quality:
- Tall, narrow tanks create higher hydrostatic pressure at the cone bottom. This pressure suppresses ester production and can alter yeast metabolism. Some yeast strains behave completely differently under pressure.
- Shorter, wider tanks reduce hydrostatic pressure on yeast. Gentler fermentation, often preferred for ale strains where ester character is desirable.
- Standard conical fermenters typically have height-to-diameter ratios between 1.5:1 and 3:1. Most craft breweries stay in the 2:1 range as a balanced compromise.
Cooling Jackets: Placement and Segmentation
Cooling jacket design directly controls fermentation temperature accuracy:
- Two-zone jackets are minimum for conical fermenters. The bottom zone controls active fermentation temperature. The upper zone assists with cold crashing.
- Three-zone systems add a middle zone for more precise temperature gradients and faster cooling during crash.
- Jacket coverage should cover at least 70-80% of the tank sidewall. Less coverage means dead zones where beer temperature drifts.
Poor jacket placement leads to temperature stratification: warm beer rises, cold beer sinks, and your temperature probe reads an average that doesn’t represent reality.
Fermenter Cone Angle: Getting Yeast Harvesting Right
The cone bottom angle determines how well yeast and trub collect and discharge:
- 60° cone: Shallow angle. Yeast doesn’t slide well. Expect sticky harvesting and more waste.
- 70-75° cone: The sweet spot for most breweries. Good yeast collection, efficient tank volume usage.
- 90° cone: Steep but wastes vertical space. Adds tank cost without proportional volume benefit.
Pro tip: Ask your tank manufacturer about their standard cone angle before ordering. Changing it later isn’t possible.
Tank Top Components: Avoiding the Contamination Danger Zone
The top of your fermenter is crowded real estate. These components compete for space:
- CIP spray ball – must have unobstructed spray pattern
- Pressure/vacuum relief valve – safety-critical, non-negotiable
- Dry-hop port – needed for modern IPA production
- Manway or inspection port – for visual checks and manual cleaning
- CO2 blow-off or collection arm
Cramming these too close together creates shadow zones—areas the CIP spray ball can’t reach. These unwashed areas become biofilm breeding grounds. This is one of the most common hidden contamination sources in commercial breweries.
Pressure Rating: Standard vs. Pressure-Capable Fermenters
This is where brewery budgets get tested:
- Non-pressure fermenters (atmospheric): Rated for minimal pressure, typically around 0.5 bar. Cheaper. Suitable for open-fermentation styles or when you’ll force-carbonate in a separate brite tank.
- Pressure-rated fermenters (2-3 bar): Significantly more expensive due to thicker walls and certification requirements. Enable natural carbonation by capping the fermenter near fermentation end, pressure fermentation, and closed transfers that minimize oxygen pickup.
The decision: If you brew lagers needing clean profiles, or hop-forward beers where oxygen is the enemy, invest in pressure capability. The cost difference pays for itself in beer stability.
Brewery Piping and Valves: The Most Common Failure Point
Pipes connect everything. Poor piping design causes more chronic brewery problems than any other subsystem.
Pipe Diameter Sizing for Brewery Applications
Pipe diameter isn’t “bigger is better.” It’s about flow velocity:
- Too small: Turbulent flow. High friction. Pumps work harder. CIP chemicals may not reach effective velocity for mechanical cleaning action.
- Too large: Laminar flow. CIP solution crawls along the pipe wall. No scouring action. Ineffective cleaning.
- Target velocity: 1.5-2.0 meters per second for CIP supply lines. Your system designer should calculate this based on pump curves and pipe diameters.
Brewery Valve Selection Guide: Butterfly vs. Ball vs. Diaphragm
Every valve type has trade-offs:
| Valve Type | 비용 | Cleanability | Best Application |
|---|---|---|---|
| Butterfly valve | 낮음 | Poor (debris traps behind disc) | Hot side only (heat kills microbes) |
| Ball valve (full-bore, encapsulated) | 높음 | 우수 | Cold side: fermenter outlets, transfer lines |
| Diaphragm valve | Medium-High | 우수 | Tank bottoms, yeast harvesting, sampling |
The smart approach: Use butterfly valves on the hot side (pre-fermentation). Invest in ball or diaphragm valves on the cold side (post-fermentation). The cost savings from using cheap valves everywhere will be eaten by your first contamination incident.
Pipe Slope: A Tiny Detail That Ruins Beer
Every horizontal pipe in a brewery needs slope—typically 1-2% (1-2 cm drop per meter of length). Without slope:
- Liquid pools in low spots after CIP cycles
- Standing water grows bacteria and mold
- The next beer through picks up contamination
You’ll smell pipe problems before you see them. A musty, sour odor near pipe racks means standing liquid somewhere. Fix it immediately.
Brewery Piping Connections: Tri-Clamp vs. Welded
| Connection Type | 장점 | 단점 |
|---|---|---|
| Tri-clamp | Easy disassembly for cleaning and modification | Multiple leak points, gasket crevices harbor bacteria |
| Fully welded (orbital) | Hygienic, no crevices, permanent | Expensive to modify, requires skilled welders |
Best practice: Weld where possible, clamp only where necessary (tank connections, valve assemblies, pump connections). Every tri-clamp gasket is a potential contamination point that needs regular inspection and replacement.
Dead Legs: The Hidden Bacteria Hotel
A dead leg is any pipe branch where fluid doesn’t flow through completely. Examples:
- A tee fitting with a capped-off branch
- A sample valve on a long extension
- An abandoned pipe run that was never removed
Rule of thumb: Any dead leg should be shorter than 1.5 times the pipe’s internal diameter. If your 2-inch pipe has a dead leg longer than 3 inches, it’s a contamination risk.
Zero dead legs is the goal. During system design, question every pipe branch. Ask: “Will CIP solution flow completely through this when it’s not in use?”
CIP Systems: How to Design a Brewery That Stays Clean
Your cleaning system is more important than your brewhouse. A great beer brewed in a dirty tank is still contaminated beer.
Central CIP Station vs. Local CIP Carts
Central CIP system: One cleaning skid serves all tanks through dedicated CIP supply and return piping.
- 장점: Single set of pumps, heaters, and chemical tanks. Lower equipment cost.
- Disadvantages: Long pipe runs that need cleaning themselves. No CIP of multiple tanks simultaneously.
Local CIP carts: Individual cleaning units per tank or tank group.
- 장점: Short pipe runs. Multiple tanks can CIP simultaneously. One contamination event doesn’t affect entire brewery.
- Disadvantages: Higher equipment cost. Multiple units to maintain.
For most craft breweries (under 30,000 bbl/year), a well-designed central CIP system works perfectly. Above that, consider dedicated systems.
CIP Spray Ball Placement: The Critical Detail
The spray ball must hit every internal surface. If it doesn’t, biofilms develop. The most common coverage failure: the tank shoulder just below the spray ball itself.
Validation: Don’t guess. Use riboflavin (vitamin B2) testing. Spray riboflavin solution on all tank surfaces, run a CIP cycle, then inspect with UV light. Any remaining glowing spots are unwashed areas. Fix the spray ball position and repeat.
CIP Chemical Tanks: Minimum Setup
At minimum, you need:
- Caustic (alkaline) tank – for organic soil removal (2-3% NaOH solution typically)
- Acid tank – for mineral scale removal and periodic passivation
- Hot water tank – for pre-rinse and final rinse
- Recovery tank – captures used chemicals for reuse
Chemical recovery saves money. Caustic can be reused multiple times if you monitor concentration and soil loading. A conductivity meter on your caustic tank pays for itself quickly.
CIP Pump Sizing
The pump must deliver sufficient flow and pressure at the spray head:
- Flow rate: Determined by spray ball specifications. Too little flow = dribbling, not blasting.
- Pressure: Must overcome static head (tank height) plus spray ball pressure drop.
- Common mistake: Specifying a pump by horsepower instead of matching the pump curve to the spray head requirements.
Work with your equipment supplier to verify the pump sizing. A CIP system that can’t deliver proper spray impact is just recirculating dirty water.
CIP Return Line Cleaning
CIP return lines carry dirty chemicals back to the skid. These lines also need cleaning. If your CIP program only cleans the tank but ignores the return piping, you’re re-contaminating the tank on the next cycle.
Solution: Include a CIP cycle that cleans the return lines themselves, typically by recirculating through a dedicated return line spray head or by periodically running a hot caustic cycle through the entire CIP piping network.
Brewery Refrigeration and Steam: The Hidden Utility Costs
These systems run continuously and dominate your utility bills. Smart design saves thousands annually.
Glycol Chiller System Sizing
Your glycol reservoir (ice water tank) buffers cooling demand:
- Too small: On hot days, multiple fermenters crashing simultaneously overwhelm the system. Glycol temperature rises, fermentation control is lost.
- Too large: Wasted capital cost, wasted space, higher glycol volume to maintain.
- Right sizing: Based on peak cooling load calculation. Sum up the worst-case scenario—typically several tanks crashing at once plus active fermentation loads.
Ammonia vs. Freon Refrigeration for Breweries
Ammonia (NH₃) systems:
- More energy-efficient (lower operating cost)
- Toxic gas—leaks are dangerous
- Strict regulatory requirements, PSM (Process Safety Management) compliance
- Higher insurance premiums
Freon (HFC) systems:
- Simpler, safer for occupied spaces
- Lower regulatory burden
- Being phased out under environmental regulations
- Replacement refrigerants are increasingly expensive
Trend: New larger breweries often choose ammonia for efficiency. Smaller breweries lean toward packaged glycol chillers using newer low-GWP refrigerants. Consult a refrigeration engineer familiar with brewery loads.
Steam Boiler Sizing for Breweries
Steam demand fluctuates dramatically:
- Peak demand: During kettle boiling—heavy steam flow for 60-90 minutes
- Idle demand: HLT temperature maintenance—minimal steam
A boiler sized for peak demand cycles on/off during low-demand periods, reducing efficiency. Options:
- Modulating burners adjust output to match demand
- Buffer tanks store steam energy and smooth demand spikes
- Multiple smaller boilers stage on/off as needed
Condensate Recovery Systems
When steam condenses in your kettle jacket, it becomes hot, pure water (condensate). Dumping this to drain wastes:
- Water (you paid to treat it)
- Heat (it’s near boiling temperature)
- Boiler chemicals (treatment chemicals are in that water)
A condensate return system pipes this back to the boiler feed tank. Typical payback: under one year. This is one of the easiest ROI calculations in brewery design.
Brewery Control Systems and Automation
Automation ranges from manual switches to fully automated brewhouses. Match the technology to your scale and team.
Brewery Automation Levels
Manual control: Push buttons, turn valves by hand, read thermometers. Works for nano-breweries (under 5 bbl). Labor-intensive but cheap and flexible.
Semi-automated: PLC-controlled temperature regulation, motorized valves for common flow paths, recipe-based step mashing. This is the sweet spot for most craft breweries (5-30 bbl). Handles repetitive tasks but still requires operator oversight.
Fully automated: Push-button brew day. Grain handling, mashing, lautering, boiling, and knockout are sequenced automatically. Excellent consistency across shifts but requires skilled troubleshooting when things go wrong.
Sensor Placement Beats Algorithms
A clever algorithm can’t compensate for bad sensor data. Best practices:
- Multiple temperature probes per tank: At minimum, one at the cone and one at the mid-body. Three probes (cone, middle, top) eliminate temperature stratification blind spots.
- Redundant critical sensors: If your mash temperature probe fails mid-brew, can you continue? Install backup probes on critical measurements.
- Calibration schedule: Probes drift. Set up regular calibration checks—monthly at minimum.
Most Cost-Effective Automation Features
Start with these. Add the fancy stuff later:
- Automated fermentation temperature control – PID loops holding setpoint within ±0.5°C improve consistency more than any other single upgrade
- Pre-programmed CIP cycles – ensures every wash hits target time, temperature, and chemical concentration
- Alarm notifications – if a fermenter exceeds temperature limits at 3 AM, your phone should alert you
Features to delay: Recipe libraries, cloud dashboards, voice control, tablet interfaces. Nice to have, but the three above save batches.
Before Buying Automation, Ask This Question
“Who fixes this when it breaks?”
If the answer involves flying in a specialist from another country, budget for that. Better yet, choose a system with local support. A broken brewery makes zero beer regardless of how advanced the control panel looks.
Key Takeaways: Designing a Commercial Brewery System
- Vessel count matches throughput needs, not brewery ambition. More vessels = more batches per day. That’s it.
- Fermenter design is recipe-critical. Tank geometry, cooling jacket placement, and pressure rating all affect beer character.
- Piping is the #1 chronic problem area. Proper diameter, slope, valve selection, and zero dead legs prevent contamination disasters.
- CIP system effectiveness determines brewery longevity. Validate spray coverage. Clean the cleaning system itself.
- Utilities drive operating costs. Properly sized refrigeration and steam with condensate recovery pay back quickly.
- Automation solves consistency, not knowledge gaps. Sensors and temperature control come first. Touchscreen dashboards come last.
Building a brewery is an expensive, complex project. Every decision connects to every other decision. Take time during design. Question everything a supplier tells you. Talk to brewers who use the equipment you’re considering.
And remember: the best brewery system is the one that makes great beer cleanly, consistently, and profitably—not the one with the most features on a spec sheet.
양조장 장비 프로젝트에 대해 궁금한 점이 있으신가요? 다음을 수행할 수 있습니다. 알려주세요 양조장에 대한 요구사항을 알려주시면 24시간 이내에 턴키 솔루션을 제공해 드립니다.