1. What Is a Nano Brewery?
A nano brewery makes beer on the smallest commercial scale in the craft industry. A typical batch runs from 50 to 200 liters. Compared to a micro brewery, a nano setup costs less to start, takes up less room, and gives you more flexibility in how you operate.
This makes nano breweries a good fit for new brands, brewpub restaurants, recipe testing, and craft beer experience spots.
In mature markets like the US, the UK, and Australia, nano breweries have proven themselves as a real business path. They let brewers test recipes, build a customer base, and grow a brand with limited money — and then scale up later when the market is ready.
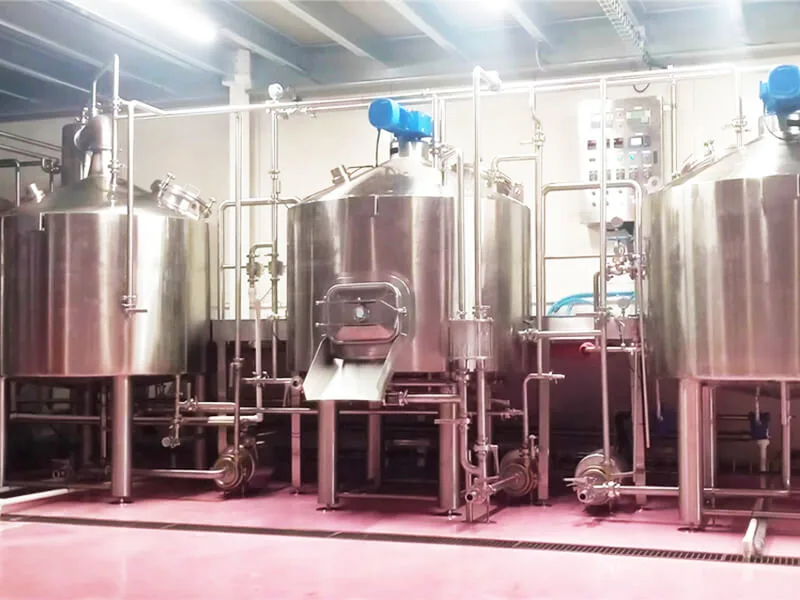
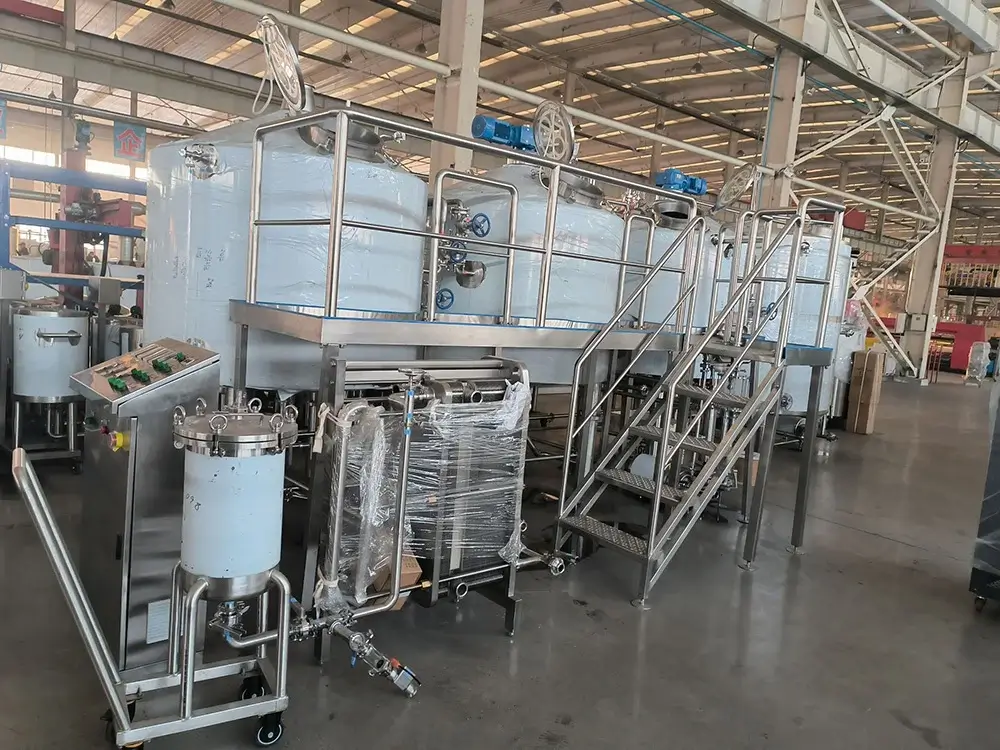
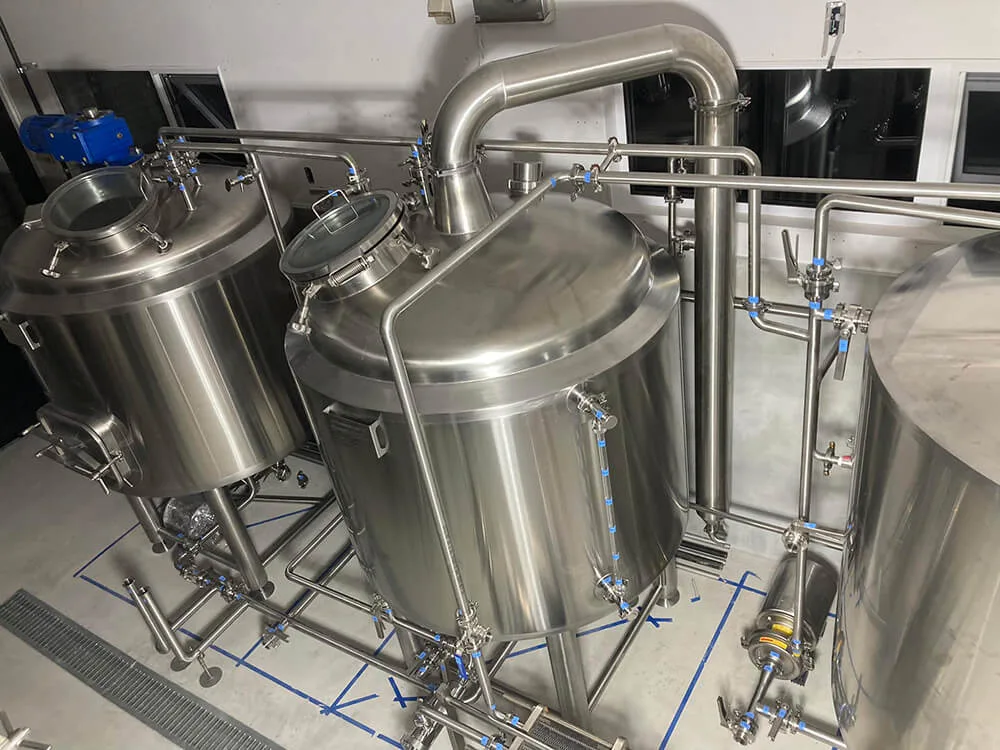
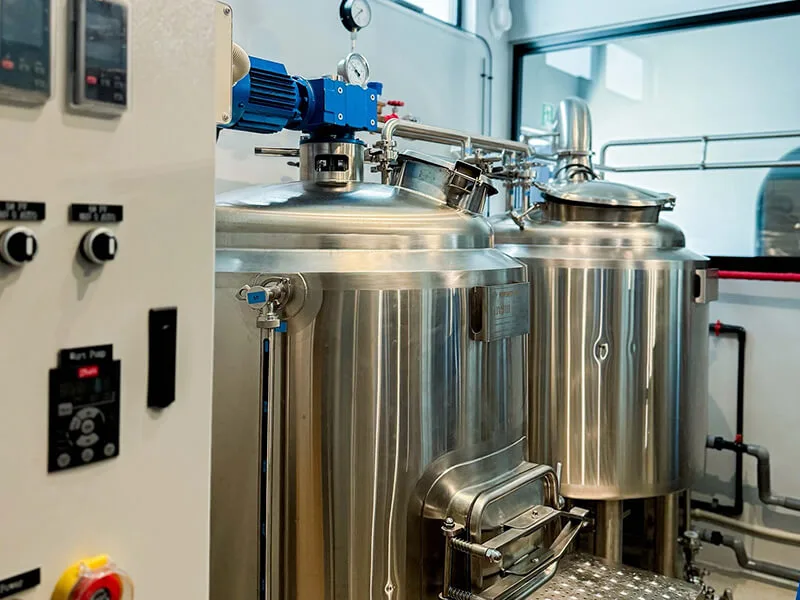
2. Key Equipment in a Nano Brewery
A complete 100L nano brewing system includes the following components. Each one directly affects how fast you can brew and how good the beer turns out.
Malt Mill (100 kg/h)
Milling comes first. A 100 kg/hour throughput matches the 100L batch size. A roller mill keeps the malt husk mostly intact while crushing the inside (the endosperm). That helps enzymes work during mashing and makes lautering easier. On a nano brewery, getting the roller gap right matters a lot — set it too tight and the grain bed blocks flow; set it too loose and you lose efficiency.
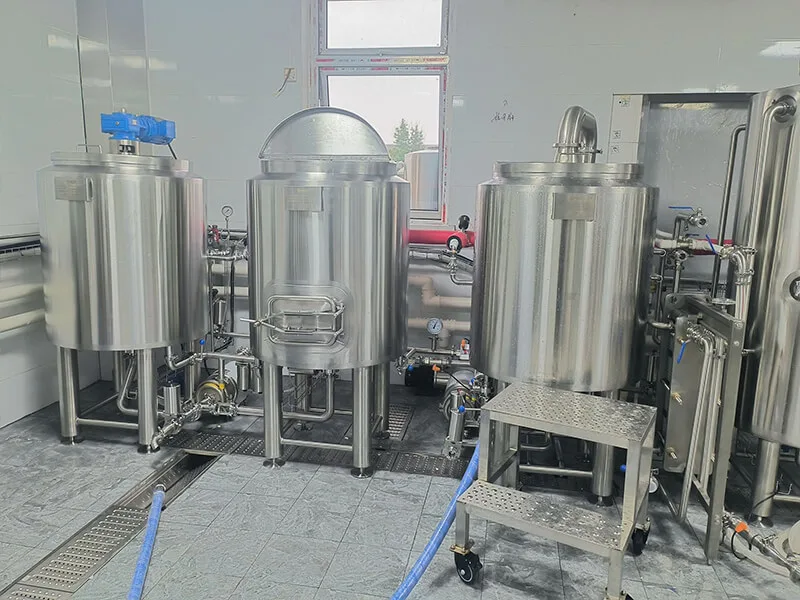
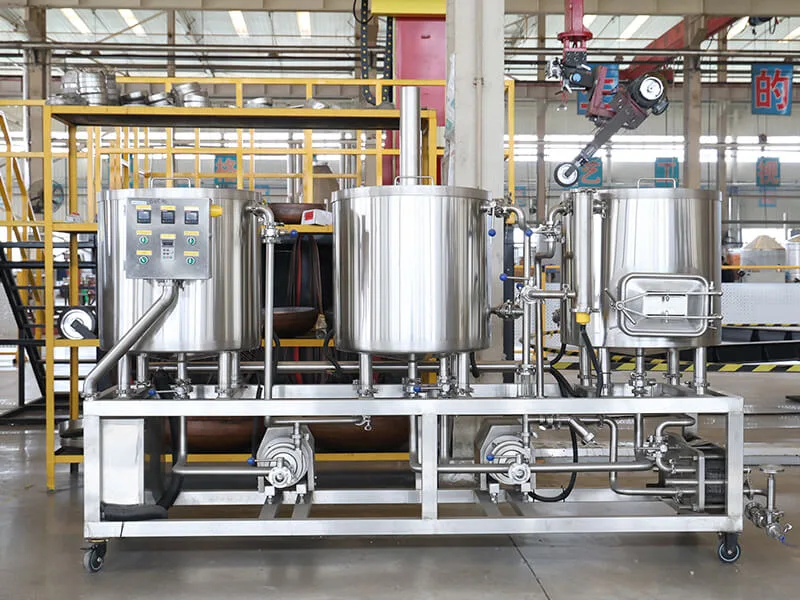
Mash/Lauter Tun Combo (100L)
This combined unit saves floor space by putting mashing and lautering into one tank. Mashing follows a programmed temperature climb — typically starting with a 45°C protein rest and moving up to 72°C for saccharification. Hot water comes from the hot liquor tank. A false bottom at the base of the lauter tun, along with vorlauf (recirculating the wort), clears up the wort before you collect it. What really matters here is the false bottom’s hole pattern and uniformity — those decide the flow rate and your efficiency.
Kettle/Whirlpool Combo (100L)
The boil does four things: sterilizes the wort, isomerizes hop bitterness, forces proteins to coagulate, and controls evaporation. On a 100L system, evaporation usually runs 8–12%. The built-in whirlpool spins the liquid, sending trub and hop debris into a tight cone at the center of the kettle floor. That leaves clear wort around the pickup point. A good whirlpool needs 15–20 minutes of settling and a steady inlet speed.
Hot Water Tank (100L)
The hot water tank feeds the mash and supplies cleaning water. Its size matches the mash tun, so one heat cycle supports an entire batch. The tank has heating elements and temperature sensors linked to the control system. This tank is what lets you hold precise mash temperatures.
Fermentation Tanks (100L × 2 units)
Two tanks let you overlap batches. While one batch ferments actively, the other can cold-condition or mature. Conical bottoms make it easy to harvest yeast and dump sediment. Cooling jackets and temperature ports let you ferment different beer styles — ales, lagers, saisons — at their ideal temperatures. With two tanks and weekly brewing, you can expect roughly 4,000–5,000 liters per year.
Glycol Cooling Tank (300L)
This tank runs the show for temperature control. A refrigeration unit chills a glycol solution and stores it in the 300L tank. From there, pumps send it to the fermentation jackets and heat exchangers. Compared to direct expansion or plain water cooling, a glycol loop gives you stable temperatures, fast response, and the ability to cool several tanks at once. 300 liters of buffer capacity handles two fermenters and one mash tun at the same time.
Automatic Control System
The control system typically includes a PLC, temperature sensors, level sensors, motorized valves, and an HMI (touchscreen). It manages mash temperature ramps, boil intensity, fermentation profiles, and CIP cleaning cycles. The right amount of automation frees you from standing over the system and helps keep batches consistent. For a startup, aim for at least automatic temperature control with alarms — you can leave valves on manual as a backup.
Stainless Steel Beer Kegs (5L × 10 units)
Small packaging matters for a nano brewery. 5L kegs work for one person, small gatherings, or a single table at a restaurant. They’re also easy for customers to take home. Ten kegs cover about half of one batch. The rest you can bottle or serve through a draft system.
3. What to Think About Before Building a Nano Brewery
Space Planning
A nano brewery needs roughly 20–50 square meters of floor space. But how you lay it out matters more than the total area. You need dedicated zones for grain storage (dry, dark, no pests), the brewhouse (with ventilation for steam), fermentation (temperature-controlled), packaging, cleaning, and finished beer storage. Keep the fermentation area away from the brewhouse so heat doesn’t interfere. And leave room to expand later.
Water, Power, and Drainage
- Water: Treat your brewing water — softener or reverse osmosis. Get a water quality report before you write any recipe. A small water treatment unit is a smart buy.
- Power: A 100L system usually pulls 15–25 kW total (heating, cooling, pumps, controls). Have a licensed electrician check your three‑phase power situation.
- Drainage: Mashing and cleaning produce a lot of hot wastewater with spent grain, yeast, and chemicals. You’ll need a sediment trap or grease interceptor to avoid plugging the sewer.
Licensing and Regulations
Legally, a nano brewery counts as a food production facility — just like a giant brewery. You’ll need a food production license or a small‑scale brewing license (rules vary by region). You may also need alcohol sales permits, tax registration, and environmental or drainage permits. Talk to local regulators and industry groups before you spend money.
Cleaning and Sanitation
Nano equipment is small with short pipe runs, so you can take things apart and clean by hand. But you still need a standard procedure (SOP). A hot caustic recirculation followed by a cold water rinse works well. The glycol loop, fermenters, and brewhouse each need their own schedule. A sanitation failure hits a nano brewery harder than a big one — one ruined batch could be more than 25% of your monthly output.
Capacity vs. Market Demand
A 100L batch comes out to about 200 bottles (500ml each). If you brew twice a week, that’s roughly 20,000 liters a year. That size can comfortably supply all the draft beer for a medium restaurant, serve as the house beer for a neighborhood taproom, or supply 3–5 retail accounts with kegs or bottles. Run a realistic sales forecast before you build. Don’t end up with too much capacity or constant shortages.
4. The Brewing Process on a 100L Nano System
Here’s a standard single‑batch brew day on a 100L nano brewery:
Step 1: Prepare the Grain
Weigh out the malt — typically 15–25 kg, depending on your target gravity. Run it through the roller mill. The husk should crack but not shred, and the endosperm should crush well.
Step 2: Mash
Add the milled grain to the mash tun and mix in hot water from the hot liquor tank. Shoot for a liquor‑to‑grist ratio of about 3:1 to 4:1. Follow your recipe’s temperature ramp — for example: 45°C for 15 minutes (protein rest), 62°C for 40 minutes (β‑amylase), 72°C for 20 minutes (α‑amylase), and 78°C for 10 minutes (mash‑out). Stir continuously or let it sit still, depending on your system.
Step 3: Lauter
Open the bottom valve of the lauter tun and recirculate the wort until it runs clear. Then sparge with 78°C hot water in batches. Collect all the wort. Aim for about 110–120 liters total to account for what boils off.
Step 4: Boil and Add Hops
Transfer the wort to the boil kettle. Boil for 60–90 minutes. Add bittering hops, flavor hops, and aroma hops at the times your recipe calls for. When the boil ends, do a whirlpool and let it settle for 15–20 minutes. Then pump the hot wort to the fermentation tank.
Step 5: Cool and Aerate
Run the hot wort through a plate heat exchanger to bring it down to fermentation temperature (18–22°C for ales, 8–12°C for lagers). While the fermenter fills, inject sterile air or oxygen to hit 8–12 mg/L dissolved oxygen.
Step 6: Ferment
Pitch your yeast and hold a steady fermentation temperature using the glycol system. Primary fermentation takes 3–7 days. When the apparent gravity hits your target, move to conditioning — dry hopping, secondary fermentation, whatever your recipe needs. Total fermentation time depends on the style: 10–14 days for ales, 3–6 weeks for lagers.
Step 7: Carbonate and Package
After fermentation, drop the temperature to 0–2°C. Carbonate either naturally (spunding) or by forcing CO₂ in — shoot for 2.2–2.6 volumes. Then package into 5L kegs or bottles. Keep everything sanitary during packaging to avoid oxidation and contamination.
5. Why Go With a Nano Brewery
Low starting cost
A full 100L system (including auxiliary gear) typically runs between USD 15,000 and 30,000. That’s about one‑third to one‑fifth the price of a 500L micro brewery.
Cheap recipe trials
Small batches let you iterate recipes fast without wasting money. A bad hop addition or a fermentation temperature spike won’t cost you much.
Freshness you can’t beat
From grain to glass can be as short as two weeks. Your customers get genuinely fresh beer — that’s your real edge over mass‑produced, packaged industrial beer.
Great for learning and experimenting
A nano system works perfectly for brewing courses, process experiments, yeast trials, and sensory training.
The marketing power of an on‑site brewery
Put your brewing equipment where customers can see it — behind glass or completely open. When people see shiny kettles and active fermenters, they want to buy. It sells itself.
6. Example: Complete 100L Nano Brewery Equipment List
Here’s a field‑proven setup for a 100L nano brewery:
- Malt Mill: 100 kg/h, two‑roller design with adjustable gap for precise crush control.
- Mash/Lauter Tun Combo: 100L, includes false bottom, agitator, and temperature probe — mashing and lautering in one vessel.
- Kettle/Whirlpool Combo: 100L, electric heating, built‑in whirlpool baffle for strong boil and clear wort.
- Hot Water Tank: 100L, insulated with heating element and temperature sensor.
- Fermentation Tanks: 100L × 2 units, conical bottom, cooling jackets, and sampling valves — independent temperature control for each.
- Glycol Cooling Tank: 300L, insulated with dedicated refrigeration unit — supplies stable coolant to fermenters and brewhouse simultaneously.
- Automatic Control System: PLC with HMI (touchscreen) for temperature program control and pump/valve sequencing.
- Stainless Steel Kegs: 5L × 10 units, with compatible dispensers for small‑format distribution.
Operational tips for this setup:
- In your first year, focus on 1–2 core styles — Pale Ale, Wheat Beer — as your main sellers. Run one seasonal or experimental batch alongside them. That balances steady income with brand energy.
- Keep detailed brew logs from day one. Write down every parameter: temperatures, pH, gravity, hop addition times, fermentation curves. Those logs are how you get better.
- Partner with local restaurants and craft beer bars. Send them 5L kegs. That cuts your packaging and shipping costs while delivering fresher beer.
- Open your doors on brew days. Let people watch or even join in. That builds community and turns casual drinkers into brand advocates.
Conclusion
A nano brewery isn’t just a shrunken industrial brewery. It’s a different way of brewing — one that packs the whole process (from milling to carbonation) into a tiny footprint. Every step stays visible and controllable.
For aspiring craft beer entrepreneurs, restaurant owners, and homebrewers ready to go pro, a 100L nano system offers the ideal starting point: manageable risk, full process control, and a clear path to profitability. As craft beer markets keep fragmenting and localizing, nano breweries will only become more important — as platforms for personal, local, and genuinely fresh beer.
Contact our engineering team today to get a customized nano brewery equipment solution.