In recent years, kombucha has been called a “living, breathing” fermented drink. With its “lightly sweet, lightly tea, lightly alcoholic” profile, it hits the sweet spot of modern wellness culture—delivering both taste and health benefits, making it a popular choice for many people.
Whether you want to unlock the joy of DIY brewing at home or plan to start a commercial kombucha venture, this guide will help you avoid pitfalls and find the right approach. From ingredients to processes, from details to common mistakes, we’ll cover everything you need to know about brewing kombucha.
Part 1: Home Brewing – Unlock Fresh Flavors with Low Cost, Zero Failure for Beginners
The essence of home brewing kombucha is “simple and natural.” You don’t need complicated equipment—just a glass jar, a few basic ingredients, and some patience. The result is a bubbly, fermented surprise. Focus on ingredient quality and process control, and even beginners can succeed.
1. Prepare Your Ingredients – Good Foundation, Good Flavor
The ingredients for kombucha are simple: water, tea, sugar, and the core ingredient—SCOBY (Symbiotic Culture Of Bacteria and Yeast). But each one matters, and wrong choices can ruin fermentation.
- Water: This is the most overlooked key! Avoid mineral water (excess minerals disrupt the microbial system) and chlorinated tap water. Choose neutral water with a pH around 7—such as filtered purified water or cooled boiled water. Gentle water quality allows the culture to grow smoothly and prevents fermentation failure.
- Tea: Prioritize whole-leaf, pesticide-free plain teas like black tea, green tea, or oolong tea. Avoid flavored teas or tea powders. Whole-leaf tea releases purer aroma and provides more stable nutrition for the culture, resulting in richer flavor.
- Sugar: Choose natural cane sugar (fewer impurities, easy for the culture to break down) or organic sugar cubes. Avoid artificial sweeteners, rock sugar, or honey. Sugar is not just for sweetness—it’s the SCOBY’s food. The culture breaks down sugar to produce organic acids and bubbles, so the type of sugar directly affects fermentation.
2. Step-by-Step Process – Every Detail Holds a Secret
Home brewing is simple, but each step matters—especially temperature and timing. Small deviations can affect taste or even cause fermentation failure. Follow along to minimize mistakes.
1) Brew the Tea – Temperature Control Is Key
Different teas require different temperatures and times. Never use cold water to steep tea—tea leaves may carry bacteria and contaminants that can infect the culture and affect safety.
- Fermented teas (e.g., black tea, oolong tea): Steep in 90°C (194°F) water for 10 minutes to fully release aroma and nutrients. For darker fermented teas like pu’er, simply let the tea cool naturally after steeping.
- Green tea: Steep in 90°C water for 3 minutes only. Longer steeping makes the tea bitter, affecting the final flavor.
- Fruit tea (if used as a base): Steep in 85°C (185°F) water for 3–5 minutes, then cold-steep again with cool water. This preserves fruit aroma while avoiding flavor damage from high heat.
2) Add Sugar – Adjust Sweetness Yourself, Remember This Rule
Adjust sugar amount to your taste, but remember: the more sugar you add, the higher the acidity and the more trace alcohol (usually ≤0.5% ABV, nothing to worry about). Beginners should start with less sugar and adjust gradually to avoid overly sour results.
When adding sugar, let the tea cool to room temperature first, then stir until fully dissolved. High heat destroys sugar structure and will kill the SCOBY—a common beginner mistake!
3) Add Fruit – Timing Is Everything
Many people like to add fruit for extra flavor, but timing is critical. Adding too early disrupts fermentation; too late, the flavor won’t integrate.
Correct approach: Add fruit only after primary fermentation (at least 14 days). Even better: add fruit 48 hours before drinking, allowing the fruit aroma to infuse without spoilage.
Choose seasonal organic fruit. Wash thoroughly and peel (pesticide residues or impurities can contaminate the brew). If using fruit purée or homemade fruit syrup, ensure no preservatives or additives are present.
4) Storage – Preserve the Fizz and Freshness
Proper storage keeps the bubbles and flavor alive. Different types require different methods:
- Plain kombucha (no fruit): Once mature, can be stored at room temperature. Keep sealed to retain carbonation and flavor.
- Fruit-added kombucha: Must be stored at around 6°C (43°F), e.g., in a refrigerator. This temperature largely stops fermentation, preventing spoilage while preserving fine bubbles.
Important reminder: All mature kombucha should be stored in sealed bottles to prevent contamination and lock in carbonation—that’s the soul of kombucha.
3. Fermentation Pitfalls – Avoid These Misunderstandings
The most common issue in home brewing is misunderstanding the pellicle (the rubbery film that forms on top). Many mistake it for the SCOBY, but that’s wrong!
Key point: The pellicle is not the SCOBY. It’s a cellulose mat secreted by the SCOBY, containing mostly acetic acid bacteria. It cannot ferment kombucha on its own. The true fermentation core is the SCOBY culture. As long as the SCOBY is healthy, you can brew great kombucha even without a visible pellicle.
Also note: If you see green, blue, or black fuzzy mold (dry, floating on the surface), discard the entire batch immediately. However, brown, stringy strands are yeast aggregates—perfectly normal.
Part 2: Commercial Brewing – From Home to Scale, Efficient and Consistent
If home brewing is a “healing craft,” commercial brewing is “standardized art.” Home brewing is low-yield and inconsistent—not scalable. To start a kombucha business, you need a professional commercial solution that differs from traditional methods, enabling efficient, stable mass production with consistent flavor across batches.
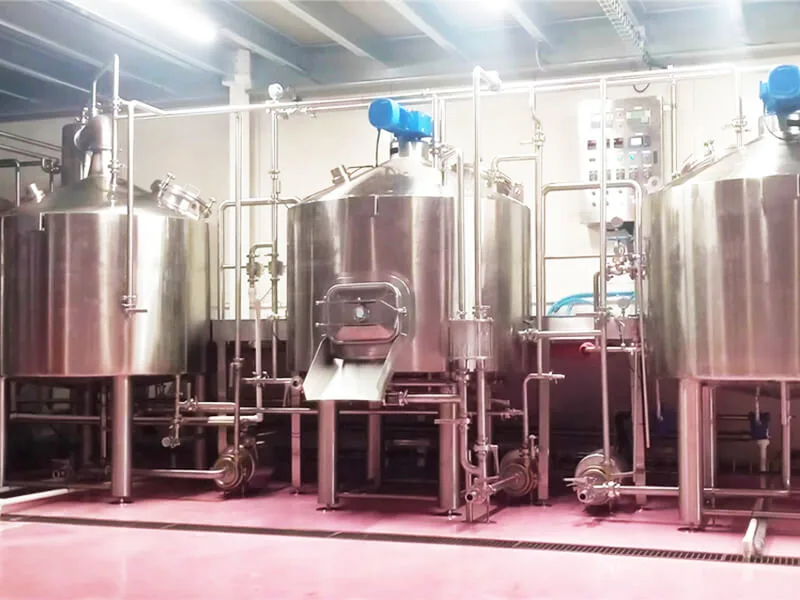
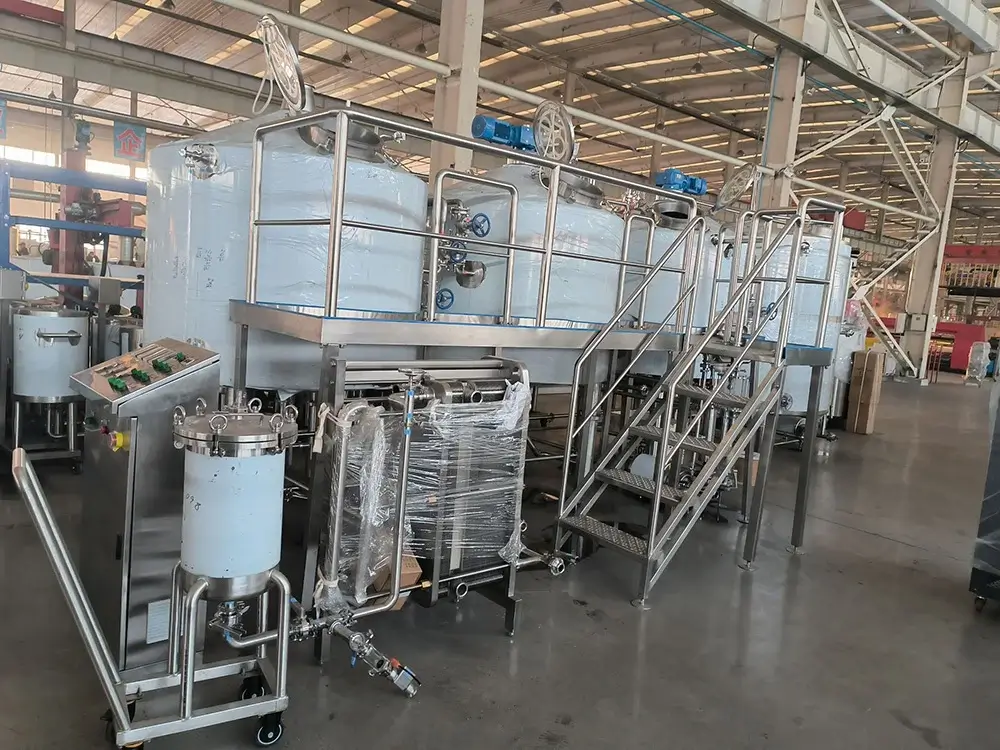
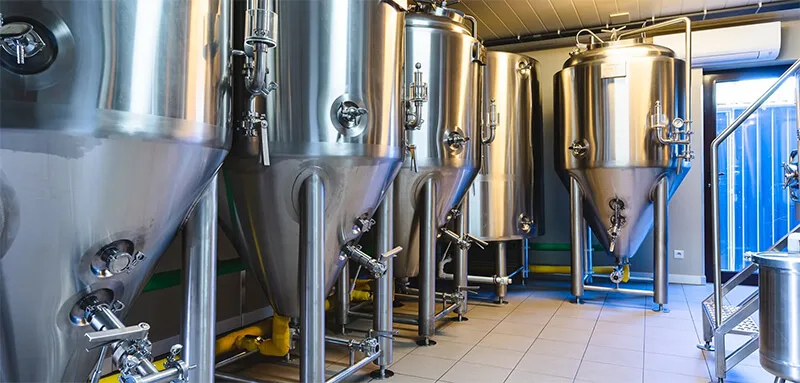
1. Commercial Equipment – The Foundation of Scale
The core of commercial brewing is standardization, and professional equipment is key. A typical system uses SUS304 stainless steel (safe, corrosion-resistant, easy to clean) and includes:
- RO Water Treatment System: Purifies water, removing impurities, minerals, and chlorine, ensuring every batch has stable pH ~7.
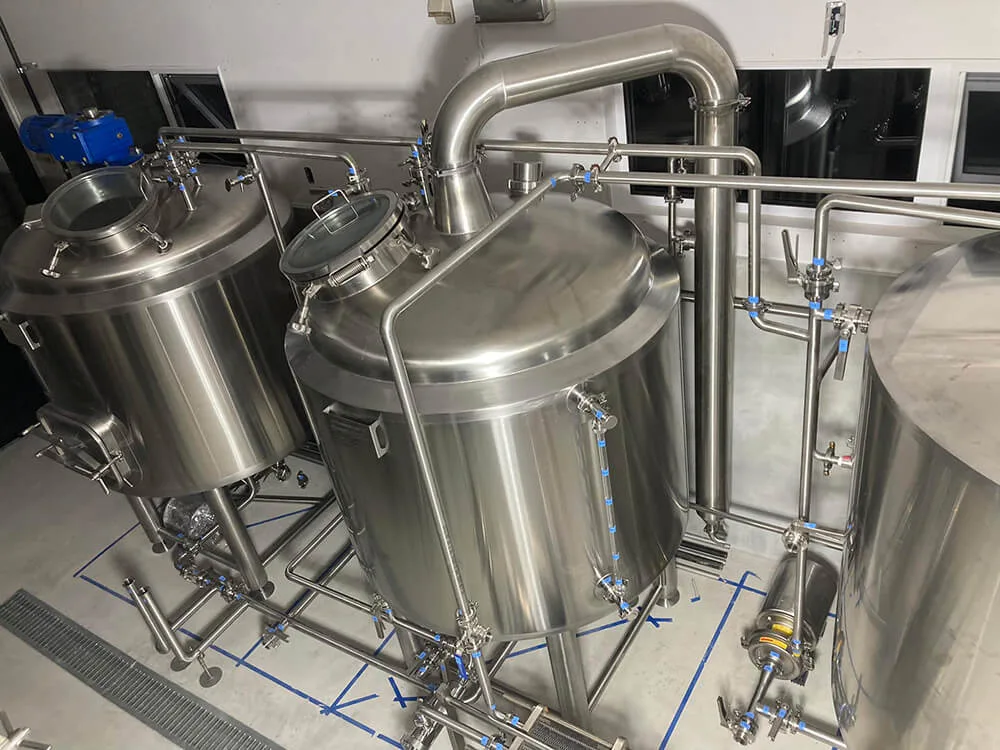
- Tea Brewing Tank: Uses steam heating for precise temperature and time control, eliminating human error and ensuring consistent tea flavor.
- Blending Tank: Much larger than the brewing tank, with stirring function. It mixes tea, sugar, and flavorings, then dilutes with purified water to target volume, maintaining mix temperature around 25°C (77°F) for optimal fermentation.
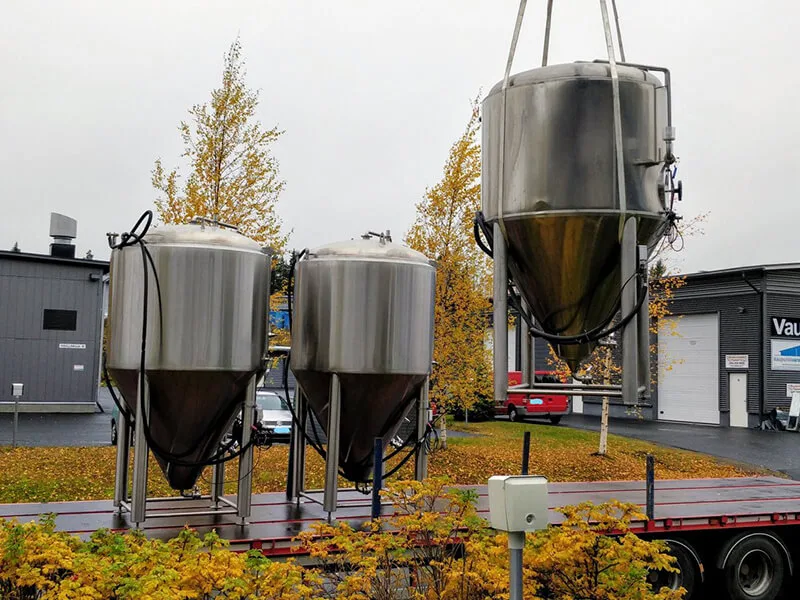
- Primary & Secondary Fermentation Tanks:
- Primary tank: open-top fermentation, add SCOBY, ~2 weeks to drinking standard.
- Secondary tank: closed fermentation. For a soda-like “bite,” inject CO₂ during secondary fermentation for finer, longer-lasting bubbles.
- Chilled Water Tank & Chiller: Controls fermentation and storage temperatures, especially for secondary fermentation and finished product storage.
- Filling Line: Automated filling increases efficiency and prevents contamination from manual handling.
2. Commercial Process Essentials – Efficient, Consistent Flavor
Commercial brewing upgrades home processes for standardization and efficiency. Key control points directly impact quality and yield:
- Brew Tea: Add whole-leaf tea to steam-heated brewing tank, control temperature precisely, heat for 10 minutes, filter tea liquor, and pump to blending tank.
- Blend: Add sugar and flavorings to blending tank, stir to dissolve, then add RO-purified water to target volume, maintaining mix temperature at ~25°C—the optimal temperature for SCOBY activity, ensuring rapid fermentation.
- Primary Fermentation: Transfer blended tea to primary tank, open-top fermentation, add SCOBY, ferment ~2 weeks to drinking standard. Monitor regularly to ensure healthy culture and avoid contamination.
- Secondary Fermentation (optional): For a soda-like mouthfeel, transfer finished kombucha to secondary tank for closed fermentation, inject CO₂ for finer, more persistent bubbles and enhanced flavor complexity.
- Filling & Storage: After fermentation, fill via automated line, seal, and store according to product type (plain/fruit-added)—room temperature or ~6°C (43°F) respectively—to ensure stable quality.
Many commercial brands now use innovative technologies such as synthetic microbial consortia (SMC) mixed-culture fermentation, which shortens the traditional 14-day cycle to 5–7 days while keeping contamination extremely low. This improves efficiency and ensures product stability—a key advantage over home brewing.
Part 3: Final Thoughts
In kombucha brewing, home brewing offers the warmth of handmade craft and personalized flavors—every cup carries your intention. Commercial brewing pursues standardized quality and efficient scale, allowing more people to enjoy fresh, stable kombucha.
Whether you want to try DIY at home or plan to start a commercial venture, I hope this guide helps unlock the secrets of kombucha brewing.
If you’re a beginner, start with home brewing to get familiar with fermentation rhythms and avoid common pitfalls. If you’re aiming for commercial brewing, prioritize standardized equipment and processes—after all, consistent quality is the foundation of long-term success.
For more information about METO’s brewery solutions, please contact our sales team.