Whether you’re a beginner homebrewer or planning to open a craft beer brewery, selecting the right brewing equipment is the foundation of making great beer. Equipment type, components, and quality directly impact brewing efficiency, beer flavor, and long-term operating costs. This guide breaks down seven key dimensions to help you clarify your needs, avoid common mistakes, and find the perfect brewery equipment, micro brewery setup, home brewery equipment, or fermentation tank for your journey.
1. Types of Brewing Equipment: Classified by Scenario and Scale
Brewing equipment is primarily categorized by batch size and use scenario. Different types vary greatly in operational difficulty, capacity, and cost. Beginners don’t need to chase high-end gear—choosing what fits your needs is what matters.
1.1 Home Brewing Equipment (Entry-Level)
Best for beginners and hobbyists. Batch size typically ranges from 50–200 liters. Features simple operation, small footprint, and low cost. Ideal for learning the basics while producing quality beer with convenience.
1.2 Small Commercial Equipment (Advanced)
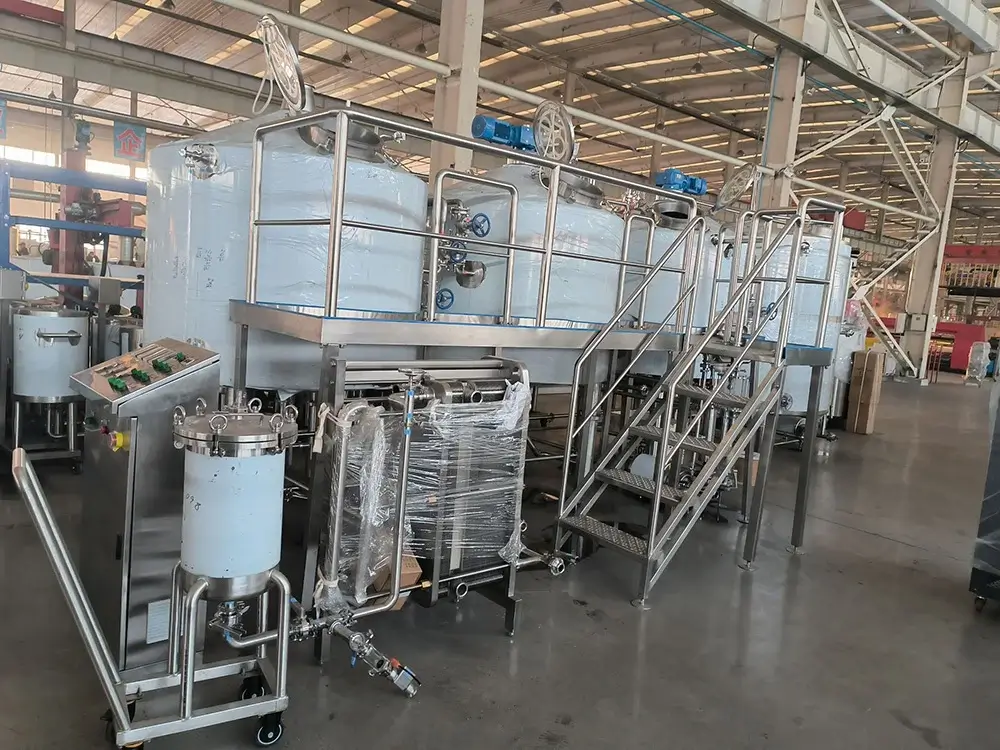
Ideal for brewpubs and small craft breweries. Batch size ranges from 300–2,000 liters. Requires some expertise and dedicated space. Modular design allows expansion (e.g., two‑vessel or three‑vessel brewhouse plus fermentation tanks). Basic automation ensures consistent, high‑quality craft beer.
1.3 Large Commercial Equipment (Professional)
Designed for full‑scale breweries. Batch sizes of 5,000 liters and up. Complete production lines including raw material handling, mashing, fermentation, filtration, and filling. Highly automated, requiring a professional team and standardized facility. Maximizes output and consistency for mass production.
2. Key Brewing Equipment Components: What Matters Most
Regardless of equipment type, the function and quality of core components directly affect beer flavor. Beginners should focus on these six critical parts.
2.1 Raw Material Handling
Primarily the grain mill – dry or wet. Dry mills are simple, easy to clean, and preferred for small to medium brewing. Wet mills keep husks intact and offer gentle shearing, ideal for high‑precision applications. Optional components include screw conveyors and temporary storage bins.
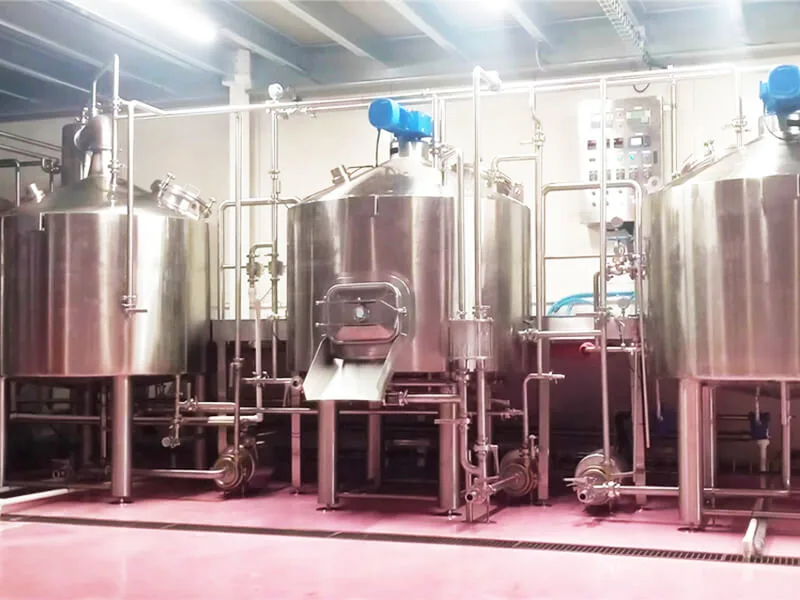
2.2 Brewhouse (Core)
The brewhouse converts malt starch into fermentable sugar. Key vessels:
- Mash Tun – Mixes malt with hot water; precise temperature control and even heating are essential. Heating options: electric (home), gas (flexible), steam (commercial preferred). Food‑grade stainless steel interior.
- Lauter Tun – Separates wort from spent grains. A well‑designed false bottom (precise slot size) and rake mechanism improve efficiency and wort clarity.
- Boil Kettle – Sterilizes wort, stops enzymes, concentrates wort, and allows hop additions. Requires sufficient heating power and anti‑overflow design. Some units combine whirlpool function for clarification.
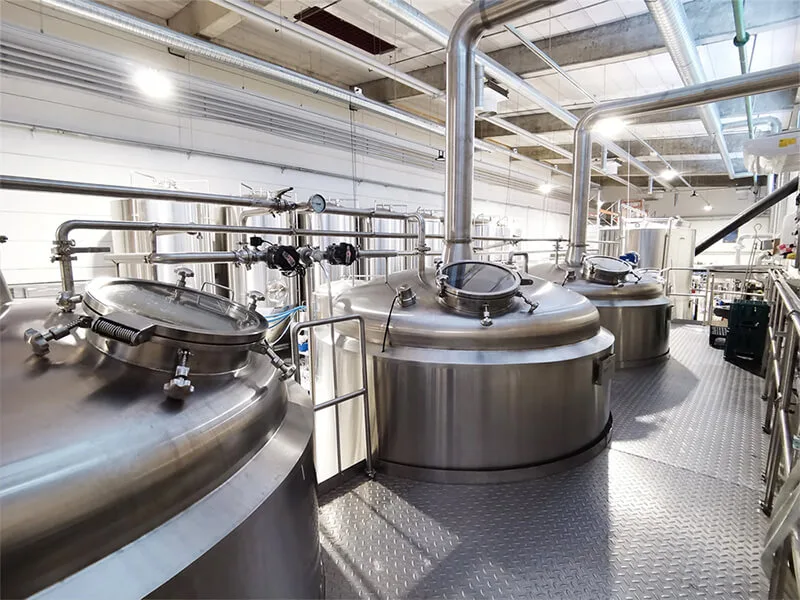
2.3 Fermentation System (Core)
The fermentation tank is where beer develops its character. Key parameters:
- Material – 304 or 316L food‑grade stainless steel. Corrosion‑resistant, odor‑free, easy to clean. Avoid plastic tanks.
- Temperature Control – Critical. Ales need 18–22°C (64–72°F); lagers need 8–12°C (46–54°F). Quality tanks have a jacketed design with coolant/heating water circulation. Accuracy: ±0.5–1°C.
- Design – Conical bottom for yeast collection and dumping. Dry‑hop port and airlock (allows CO₂ escape, blocks contaminants). Maintains airtightness and ease of operation.

2.4 Cooling System
After boiling, wort must be rapidly cooled to fermentation temperature (18–22°C / 64–72°F) to prevent infection and oxidation. Plate heat exchanger is commercial standard – efficient, compact, cools 50 liters in 3–5 minutes. Homebrewers can use an immersion chiller (lower cost, suitable for small batches).
2.5 Cleaning & Auxiliary Systems
- CIP – Essential for commercial equipment. Uses spray balls and recirculated cleaning solution to automatically clean tanks and pipes, ensuring hygiene and reducing labor.
- Control System – The “brain”. From simple PID controllers to full PLC automation. Beginners benefit from smart, one‑touch systems; experienced brewers may prefer manual control for flexibility.
- Pumps, Pipes & Valves – All liquid transfer components must be food‑grade stainless steel, leak‑free, and easy to sanitize.
2.6 Filling Equipment (Commercial Only)
For bottling, canning, or kegging. Includes rinsers, inspection systems, fillers, pasteurizers, labelers. Critical requirement: aseptic operation to avoid secondary contamination.
3. How to Choose the Right Equipment: 4 Steps to Match Your Needs
The key is fit – your capacity, process requirements, budget, and space. Follow these four steps to avoid 90% of common mistakes.
Step 1: Define Your Core Requirements
Ask two questions:
- Batch size – Home: 50–200 L; brewpub/small brewery: 300–2,000 L; large brewery: 5,000 L+. (Note: equipment “capacity” refers to wort volume at max grain load; final beer yield is slightly lower.)
- Brewing frequency – Weekly (home), 1–2 batches/day (small commercial), or continuous (large commercial). High frequency demands multiple fermentation tanks to avoid waiting.
Step 2: Match Equipment Type to Your Process
- Beginners / Homebrewers – Start with home brewing equipment (simple, compact). If you plan to grow, choose modular gear that allows later expansion.
- Brewpubs / Small Breweries – Choose modular small commercial systems (two‑vessel or three‑vessel brewhouse + 3–5 fermentation tanks). Prioritize smart controls and CIP to reduce labor and ensure consistency.
- Large Breweries – Opt for fully automated production lines covering raw material handling, brewhouse, fermentation, and filling. Focus on capacity, automation level, and energy efficiency.
Step 3: Inspect Core Component Quality
Three key checks:
- Material – All wetted parts must be 304/316L stainless steel. Thickness: ≥3mm for brewhouse vessels, ≥2mm for fermentation tanks. Mirror‑polished interior minimizes residue and simplifies cleaning.
- Temperature Accuracy – Fermentation control to ±0.5–1°C. Stable mashing temperature. Heating method appropriate for scale (electric for home, steam/gas for commercial).
- Workmanship – Argon arc welding (smooth seams, no hiding spots for bacteria). Food‑grade silicone seals. Dead‑spot‑free design (e.g., rounded vessel bottoms).
Step 4: Check After‑Sales Support and Expandability
- Warranty & support – Core vessels (brewhouse, fermentation tanks): at least 10 years. Motors, temperature controls: 6 months. Commercial buyers should look for suppliers offering on‑site installation, commissioning, and brewing training.
- Expandability – Modular systems allow adding tanks or increasing capacity later, saving cost compared to buying entirely new gear. Ensure spare parts (seals, gaskets, filters, spray balls) are readily available.
4. Maintenance & Cleaning: Extend Equipment Life and Protect Flavor
Proper maintenance not only extends equipment life (by 10+ years) but also prevents contamination, ensuring consistent beer quality. Follow the “full lifecycle” approach.
Daily Maintenance (after each batch)
- Clean & sanitize – Immediately wash all wetted parts with food‑grade detergent and hot water circulation. Remove spent grains, trub, and hop residue. Sanitize cold‑side equipment (fermentation tanks, filling ports) and air‑dry.
- Check seals – Inspect valves, flanges, gaskets for leaks. Replace worn parts to prevent leakage and microbial ingress.
- Drain & remove debris – Clear mash tun and boil kettle residues. Drain condensation from pipes.
- Calibrate instruments – Verify thermometers, pressure gauges, flow meters for accuracy.
Periodic Maintenance
- Weekly – Lubricate pumps, motor bearings, drive chains with food‑grade oil. Remove and soak cleanable parts (false bottom, spray balls). Check control panels for loose wiring or overheating.
- Monthly – Run equipment idling for 30 minutes, listening for abnormal noise or vibration. Replace filters, gaskets, and screens. Inspect pipe interiors for scaling or corrosion (use a borescope); descale if needed.
- Quarterly – Descale boilers and clean condenser fins. Check refrigerant pressure and cooling efficiency. Test safety valves, pressure relief devices, and emergency stops. Recalibrate PID and pressure sensors.
- Annual – Disassemble key components (mill, centrifugal pump) to inspect internal wear. Apply anti‑rust coating to external surfaces. Consider automation or energy‑saving upgrades.
Special Care (Long‑term Shutdown)
- Drain and dry all vessels thoroughly. Seal openings.
- Cover with dust‑proof covers and place desiccant in a ventilated, dry area.
- Power on equipment idling for 10 minutes every quarter to prevent moisture damage to electrical parts.
Cleaning Don’ts
- Never use chlorine‑based cleaners – they corrode stainless steel and affect beer flavor. Use food‑grade neutral detergents.
- Avoid hard brushes – they scratch stainless steel, creating hiding places for bacteria. Use soft sponges or dedicated cleaning cloths.
- After cleaning, ensure fermentation tanks are completely dry. Rinse pipes thoroughly to remove any detergent residue.
5. Frequently Asked Questions (FAQ)
Q1: Why must equipment material be 304 or 316L stainless steel?
Ordinary steel or plastic can corrode or leach harmful substances when in contact with acidic wort/beer. 304/316L is food‑grade, non‑corrosive, odorless, and easy to clean. 316L offers even higher corrosion resistance for sour beers.
Q2: Does poor fermentation temperature accuracy ruin beer flavor?
Yes. Too high → excessive higher alcohols (harsh, headache‑inducing). Too low → sluggish yeast activity, incomplete fermentation (thin, sweet, unbalanced). Aim for ±1°C accuracy; ±0.5°C is premium.
Q3: My beer has off‑flavors after some time. Why?
Most likely incomplete cleaning or aged seals causing bacterial contamination. Solution: thoroughly clean equipment (especially tank walls and pipe dead legs), replace gaskets/seals, sanitize after every batch. For persistent off‑flavors, deep‑sanitize with food‑grade sanitizer (soak 30 min, then rinse).
Q4: Do small commercial breweries need a CIP system?
Highly recommended. Manual cleaning of 100–500 L systems is labor‑intensive and often misses pipe and tank dead spots, leading to contamination risk. CIP automates the process, saves labor, and ensures consistent hygiene for back‑to‑back batches.
Q5: Wort filtration is very slow. What can I do?
Common causes: over‑crushed malt (husks shredded, blocking false bottom) or clogged slots. Solutions: adjust mill rollers to avoid over‑crushing; let grain bed settle before vorlauf; control recirculation rate (≤1.5 L/min); if slots are clogged, disassemble and soak clean.
Q6: How do I quickly troubleshoot equipment failure?
Start simple:
- Temperature issue → check thermometer calibration, heating/cooling system, wiring.
- Leak → inspect seals and pipe joints; replace worn parts.
- Motor not working → check power supply and connections.
- Fermentation problem → check yeast viability, temperature, and signs of contamination.
Keep a maintenance log (fault, cause, solution) and stock key spares (pump seals, gaskets, fuses) to minimize downtime.
Final Summary
Choosing the best brewery equipment is all about matching your needs – beginners shouldn’t overspend on commercial gear, and commercial operators shouldn’t cut corners on quality. Pay close attention to core components, after‑sales support, and expandability. Combined with proper cleaning and maintenance, your equipment will run reliably for years, delivering consistent, great‑tasting beer batch after batch. Whether you’re a homebrewer or an aspiring craft brewery owner, this guide helps you make an informed decision and brew your own outstanding beer.
Contact Meto today to learn more about our brewery solutions and find the brewery equipment for your brewery.